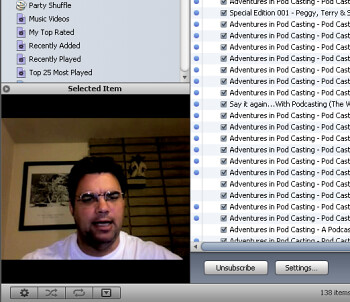
I had an opportunity to sit down with the MacBook Pro again this past Sunday, (well three Sunday’s ago at the time of this writing), as I recorded Podcast 36 for Adventures in Podcasting. However, this time I once again crossed the line into the world of vodcasting. Now if you are a fan of the show you also know the show was published in three formats, (Vodcast, Enhanced Podcast and MP3). In this post I will share my experience in Vodcasting with the MacBook Pro.
As I tell my tale, I will explain the process I went through as I created not one, but all three formats. Then I will explain what I learned from the process and what I would change if I were to do another or make a habit of vodcasting with the MacBook Pro.
What I did….
Step 1 – iMOvie
I have never been enamored with built in microphones on any computer and considering the level of ambient noise in my home office, (air conditioner, fan and of course children), I chose to use my Audio Technica wireless microphone with the MacBook Pro. I believe it worked quite well. Once I had tested the microphone, I fired up iMovie switched the input to the iSight camera and began recording. In my normal fashion, I droned on for about 30 minutes or so. However, I did notice I was talking a bit faster than normal. Perhaps the camera made me nervous!
After the podcast video was complete, I began the learning process of creating the podcast in not one, but three formats. Wanting to have a snappy introduction, I shared the video file to Garage Band 3 where I quickly noticed my first mistake. I had no room for the introduction track and I wanted a still image displayed as my introduction track played. So… Back to iMove I went thus abandoning the initial import into Garage Band.
Back in iMovie, I moved the video forward 54 seconds. This happens to be the length of my introduction music. Next, I imported an image and placed this on the video track. I couldn’t have a dead screen while I talked could I?
Step 2 – Garage Band
Once the video file was imported into Garage Band, I imported my introduction and exit audio placing these tracks in the appropriate locations on the timeline. Next I recorded the voice track for both the intro and exit tracks. Of course, I had to tinker with the volume level of the music audio so it wouldn’t drown out my own voice. From there, I shared the file with iTunes. (Yeah…) The vodcast file of Adventures in Podcasting, podcast 36 was complete.
Step 3 – Creating the Enhanced Podcast
Now that the video was complete, I still wanted to be able to post an audio version of my podcast. Earlier, I had noticed that iMovie would allow me to separate the audio from the video. With that in mind, I returned to iMovie.
In iMovie, I imported the completed video file. (If you recall, I had added the intro and exit music to the podcast in Garage Band therefore I could not use the original video recording.) Now that the completed video was imported, I separated audio from the video and shared the video with Garage Band. (Note: Even though the audio was split from the video, both tracks are still shared with Garage Band.)
Back in Garage Band, I deleted the video track leaving only the audio. Next, I added the chapters to the audio file and placed images on the chapter marks. (Sorry, I was lazy, I used the same image for each chapter.) Once the chapters were complete it was time to share the files with iTunes. A few minutes later, the Enhanced Podcast version of Adventures in Podcasting, podcast 36 was complete.
Step 4 – Creating the MP3 file
Creating and MP3 from a M4A file in iTunes had to be the easiest process of the project. All you have to do is Right Click and choose “Convert File to MP3” OOPS… Sorry, I had a mouse connected to the MacBook Pro. I could have also pressed Command, (open Apple for us old timers), and clicked on the file with the mouse. Viola, the MP3 version of Adventures in Podcasting, podcast 36 was also complete.
The last phase of this project was to post the files to the internet and publish the RSS feed. Unfortunately, it was quite late at this time so I chose to bun the three files to a data DVD and complete the process the following day.
I did, however, have an overwhelming urge to try out iDVD. So… In addition to Podcast 36 being available in vodcast and two audio formats, I have a DVD of the show as well.
In hind site…
The project with the MacBook Pro was really no different than my first several podcasts. I learned something with each step and if I were to do another vodcast using a MacBook Pro, I would do several things differently. In fact, the process would parallel the same steps I use to create Adventures in Podcasting.
The process I would use:
- Prerecord the introduction and exit tracks. This could be done with video or audio only.
- Import the introduction track into iMovie.
- Record the vodcast.
- Edit as needed.
- Import the exit track.
- Render the video.
- Upload file, update and upload the RSS file.
Considering I still prefer audio to video in my Podcast, I would also split the audio and complete the process of creating the MP3 file. That process, to my knowledge, would be the same as I noted above.
In the end, Adventures in Podcasting, podcast 36 took 7 hours to create in the three formats and it would be safe to say that 5 hours of that time was be learning how to do what I wanted to do. Following steps 1 through 7 listed above, a vodcast on a MacBook Pro wouldn’t take anymore time to create than a standard audio podcast. Noting one important fact… Podcast 36 was a talking head video which didn’t require much, if any, editing. If you plan to create a vodcast that is worth watching, (Sorry, my talking head is NOT interesting) you will need to plan for editing. Of course that is normal with any video project.
iLife and My Thoughts
iLive has to be flat out one of the slickest pieces of software I have ever used. Even after being away from a Mac for 8 years, I found this software intuitive. The integration between iMovie, Garage Band, iTunes, iPhoto and iDVD was absolutely seamless.
I said it before, and I will say it again, the MacBook Pro is an impressive machine. I still wish it had a right mouse button and came preloaded with both operating systems. Who knows, maybe by the time my Sony Vaio is due to be replaced I might get my wish.
Technorati
MacBook Pro Macintosh MacBook Podcasting Podcast Vodcast video cast K-12 Shawn Wheeler


 Digg/shawnwheeler
 Flickr/shawnwheeler
 Linkedin/shawnwheeler
 YouTube/ShawnErikWheeler
 Del.icio.us/shawnwheeler
 Wikipedia/shawn_erik_wheeler
 GMail/Shawn Wheeler
 Technorati/shawnwheeler
 Blog/Shawn Wheeler
No comments:
Post a Comment